
Multi-Screen Video Wall Installing Guide
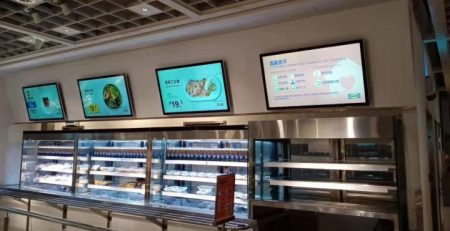
If you have ever been out shopping in malls or huge retail stores, you may have seen different images projected on huge walls. From a distance, these might seem like giant TVs or monitors, but if you look closer, you will realize that they are just a bunch of different screens put together.
Think of it as a puzzle. Each piece has a different image, and when you put everything together, you get to see the whole picture. The same rule applies here.
Now, you may be wondering how do they actually do it? This article will tell you just that. Here you will find everything there is to know about video walls.
What Is A Video Wall?
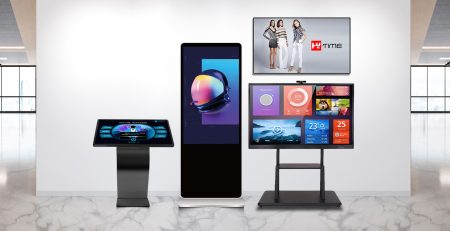
Video walls can normally be set up in huge shopping malls, retail stores, music festivals, corporate events, and so on. In simple words, a video wall is a special setup that involves the use of multiple (usually 4) screens and monitors. Therefore, it is also termed 4 screens video wall.
They can either overlap each other or simply just be tiled next to each other. The result is a big, bright virtual image. This certainly adds a “Wow” factor and can easily capture people’s attention even from miles away.
How To Install A Video Wall?
Setting up a multiple screens video wall can be quite a tricky task. But we’re here to help, and have simplified the process by creating this step-by-step guide on how to install a video wall.
There are two major types of video walls. The first type is where monitors are set up to have them display just one huge image. The second type is similar to the first in terms of setup, but here, they will display a variety of different images.
Luckily, you will find simplified methods for both these types below!
Type 1 – Displaying 1 Image
Step #1: Map Out The Dimensions
The first step in this method is two determine how big you want the screen to be. A video wall can be really big or small. Based on your preference, you will first need to map out the required dimensions.
Step #2: Decide The Configuration
A video wall can have both even and odd number of rows and columns. For example, an even video wall will have a configuration of 2 x 2, i.e., two monitors by two monitors or 4 x 4, i.e., four monitors by four monitors.
The latter can have 1 x 4, i.e., one monitor by four monitors, or 3 x 4, i.e., three monitors by four monitors. But, again, this depends on your preference.
Step #3: Buy The Video Wall Controller
The only major requirement here is the video wall controller. Once you’ve purchased this, all you need to do is connect them to each of your monitors using a good HDMI cable.
Note: The controller needs to have the same (or more) number of ports as the total number of monitors you have.
Step #4: Connect The Enplug
The En-plug is what will bring the content on the screen come alive. So after you connect the ports, you will also add the Enplug to the video wall. And, voila!
Type 2 – Displaying Multiple Images
Step #1: Map Out The Dimensions
Decide how many monitors you would like to have in your video wall and securely mount them onto the desired wall.
Step #2: Add Enplug To All The Monitors
By using an HDMI cable, you will need to connect the Enplug to each of your screens. In order to display the image, you need to use the dashboard provided by Enplug. This will allow you to decide and select which image goes on which screen.
Note: You do not require a video wall controller for this type.
Final Words
Getting the attention of people even when they are far away is easier with a video wall. To put it simply, they are big, bright, and beautiful, and that pulls people in.
Setting up a multiple screens video wall can be difficult if you are a beginner at tech stuff. Our step-by-step guide is guaranteed to make the process easy for you without any hassle. Once you’ve successfully installed it, you can enjoy your content on the big screen!


Leave a Reply
You must be logged in to post a comment.